Adding PRx Modules to the OI
NOTE: Access to this function is normally restricted to Nordson field service personnel or trained administrators.
This function is normally used only to add PRx Modules to the OI that are not associated with a Spray Monitor by the node address switch setting. To associate a PRx Module with a Spray Monitor, the PRx Module address switch must be set to the same address as the Spray Monitor.
-
 Touch the Tools button on the main screen button bar.
-
 Choose System Configuration on the drop-down menu.
-
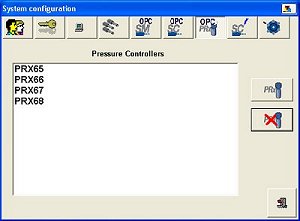
 Touch the OPC PRx button. The System Configuration window changes to show the PRx Module list and OPC function buttons.
-
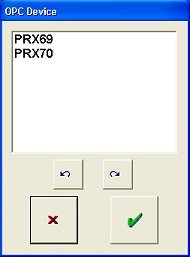
 Touch the Add PRx Module button. The OPC Device window opens, listing any PRx Modules on the network that have not already been added to the OI.
NOTE: The OPC Server always recognizes the PRx Modules by their default names (PRX65, PRX66, etc.). The PRX number is the module address switch setting plus 64.
-
Touch the names of the Modules you want to add, or
 Select all Modules.
 Deselect all selected Modules.
-
 Accept the selections, or
 cancel.
The PRx Module faceplates appear on the main screen.
-
Make Service Settings for each PRx Module.
-
Create Spray Machines if you are going to use One-Button Recipes.
-
Configure the PRx Modules before beginning production.