![]() Touch
the information and setup bar on the PRx Module faceplate.
Touch
the information and setup bar on the PRx Module faceplate.
![]() Select PRx
Configuration from the drop-down menu.
Select PRx
Configuration from the drop-down menu.
NOTE: PRx Modules must be used with Spray Monitors. PRx modules do not have to be added to the OI like the Spray Monitors and Spray Controllers The PRx Modules are automatically recognized by the OI when they are connected to the network and are associated with a Spray Monitor when their node address is set to the same address as the Spray Monitor. Refer to the PRx hardware manual for the switch settings.
PRx Modules are input/output modules designed specifically for can coating operations. PRx Modules perform the following functions:
Temperature Monitor - uses the inputs from a combination pressure transducer/RTD to monitor fluid temperature at the spray gun.
Spin Belt Speed, Chuck Speed, Chuck Bearing Speed Monitoring and Control - uses inputs from sensors to monitor spin belt pulley speed. Outputs the belt speed setpoint and the actual belt speed to a customer-supplied controller that controls the belt motor. (For speed control, requires an optional Anybus module.) Can also monitor vacuum chuck speed and chuck bearing performance. These two functions require additional sensors for turret home, turret indexing, and chuck speed.
Pressure Control - outputs a desired base pressure to an Nordson pressure controller to control base pressure and obtain the desired fire pressure.
Run/Stop Input - notifies the iTrax system when the can line is started or stopped. Prevents false belt speed or belt spin detect faults.
In addition, the PRx module includes XCIP (extended can-in-pocket) inputs:
Vacuum Detect
Gun Mount Position
Can-In-Pocket
Belt Spin Detect
If the XCIP output is enabled, these inputs are combined together. If a malfunction is detected on any of these inputs a fault signal is output to the Spray Monitor, which then turns on an alarm to alert the operator.
PRx functions must be set up by your Nordson service representative. If you need to add or delete a function, contact your service representative.
PRx module configuration screens can be accessed in two ways:
![]() Touch
the information and setup bar on the PRx Module faceplate.
Touch
the information and setup bar on the PRx Module faceplate.
![]() Select PRx
Configuration from the drop-down menu.
Select PRx
Configuration from the drop-down menu.
Or:
![]() Touch
the Tools button on the main
button bar.
Touch
the Tools button on the main
button bar.
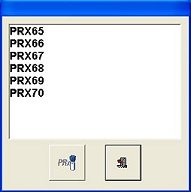
![]() Select PRx
Configuration from the drop-down menu. A list
window opens.
Select PRx
Configuration from the drop-down menu. A list
window opens.
Select the PRx Module you want to configure from the list.
![]() Touch the PRx
Module button.
Touch the PRx
Module button.
NOTE: You can only access the Copy PRx Configuration function from the PRx Module faceplate Information and Setup bar.